Configure OpenID SSO for TalentLMS
These steps show you how to configure the single sign-on (SSO) functionality using OpenID to TalentLMS from ManageEngine ADSelfService Plus.
Prerequisites
- Do not terminate the session before the configuration is complete in both the identity provider and the service provider.
- Please enable HTTPS is the product to ensure proper functioning of single sign-on.
- Login to ADSelfService Plus as Super admin.
- Go to Configuration > Password Sync/ Single Sign On and click Add Application. Select TalentLMS from the list.
Note: You can also use the search bar, in the top-left, to search for the application.
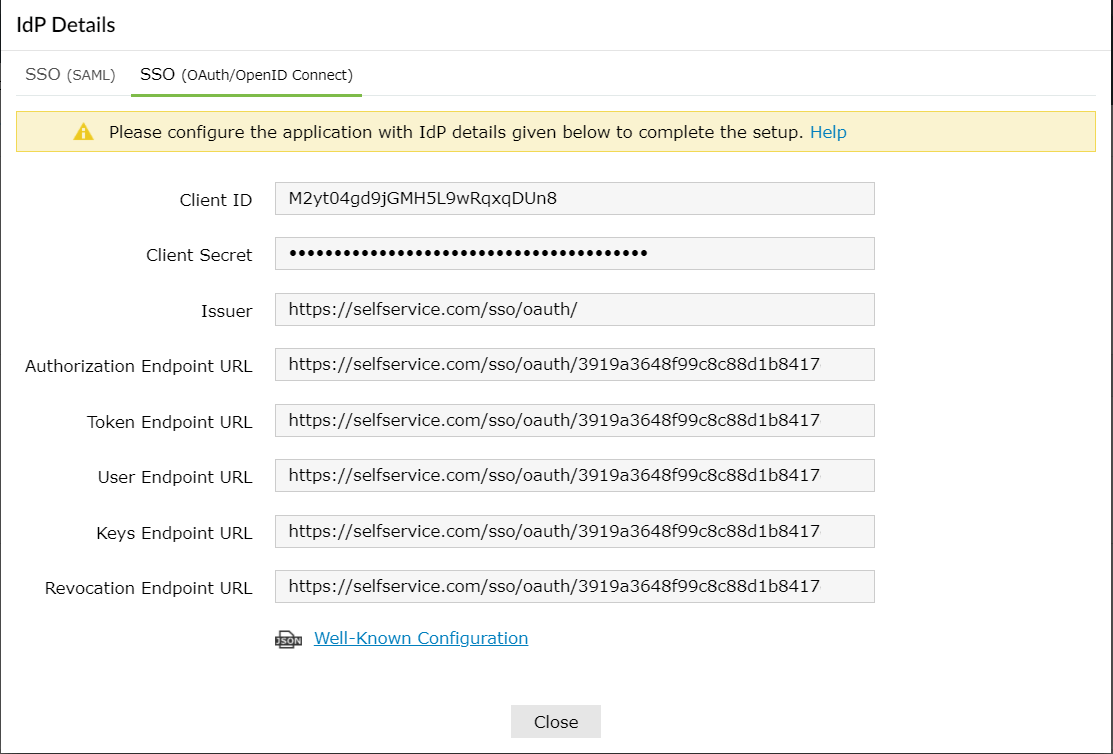
- Click on IdP Details and select SSO (OAuth/OpenID Connect) tab.
- Copy Client ID, Client Secret, Authorization Endpoint URL, Token Endpoint URL, and User Endpoint URL.
TalentLMS (service provider) configuration steps
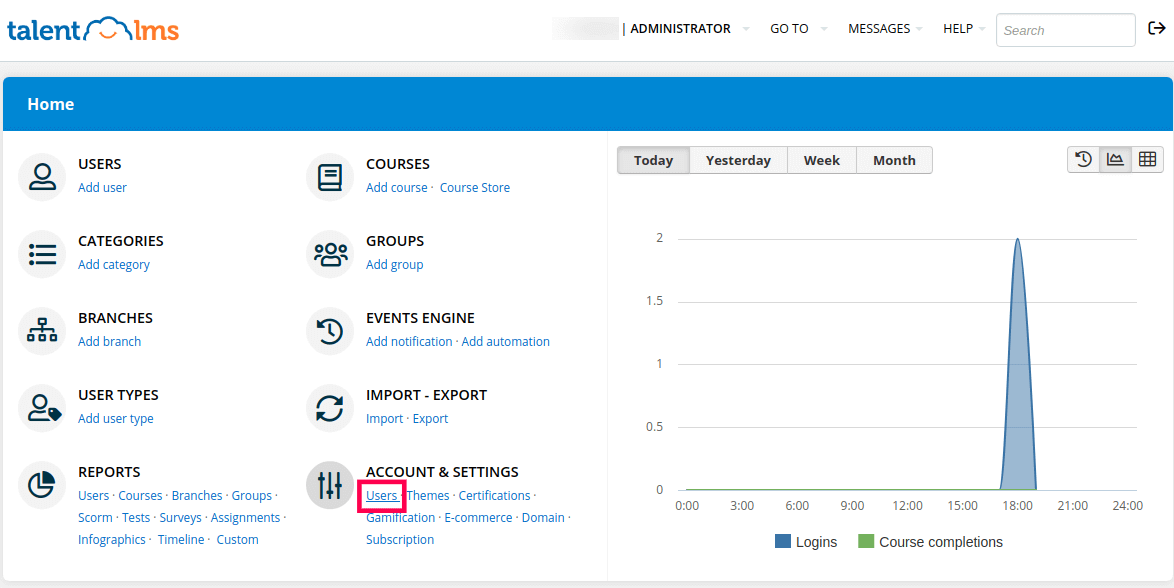
- Login to TalentLMS account with admin credentials.
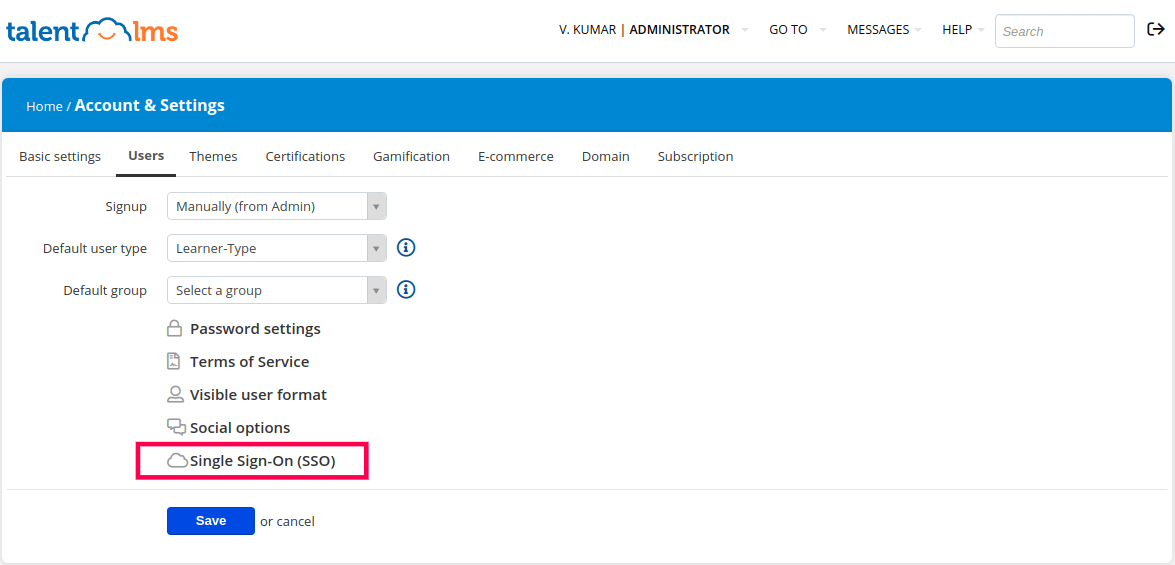
- Go to Home → Account & Settings → Users and click Single Sign-On (SSO).
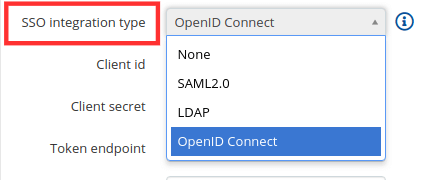
- Select the SSO Integration Type as OpenID Connect from the drop-down list.
- Enter the following fields with corresponding details copied in the step 4 of Prerequisites:
- Client id: Client ID
- Client secret: Client Secret
- Token endpoint: Token endpoint URL
- User info endpoint: User Endpoint URL
- Authorization endpoint: Authorization Endpoint URL
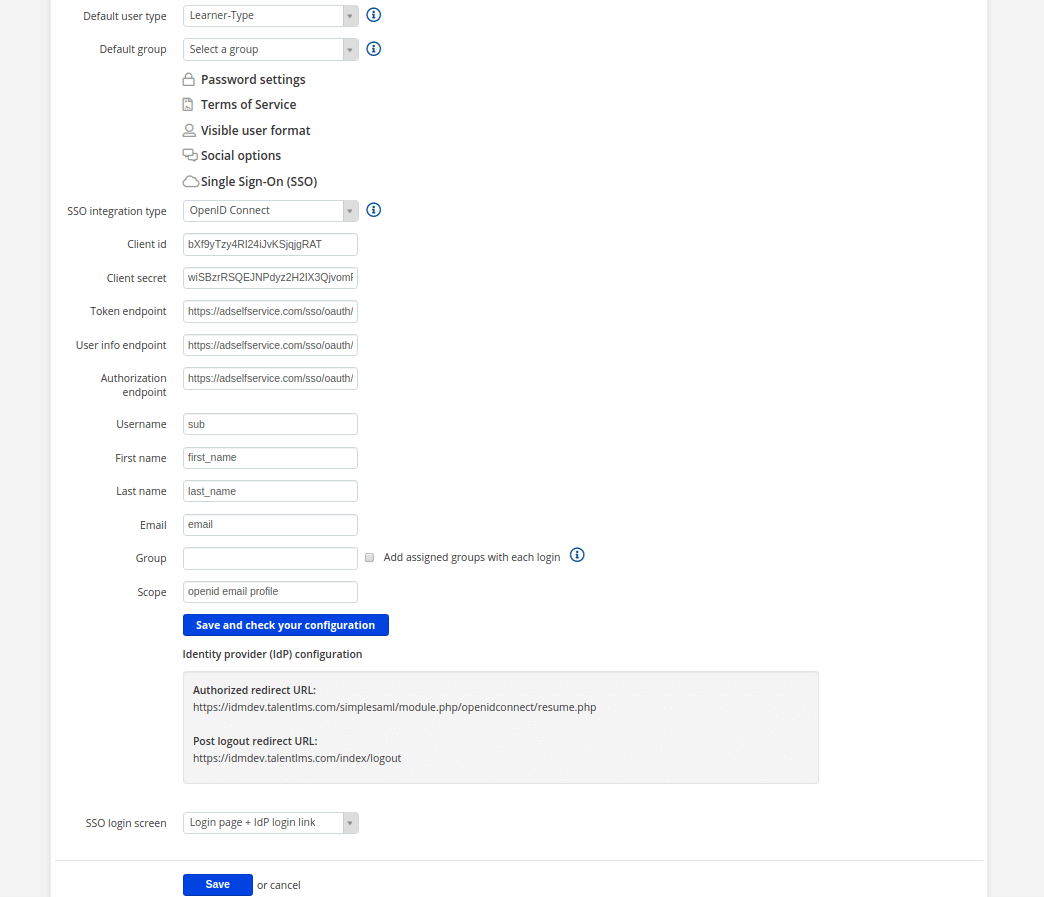
- Fill in the following fields as mentioned below:
- Username: sub
- First name: first_name
- Last name: last_name
- Email: email
- Scope: openid email profile
- Click Save and check your configuration.
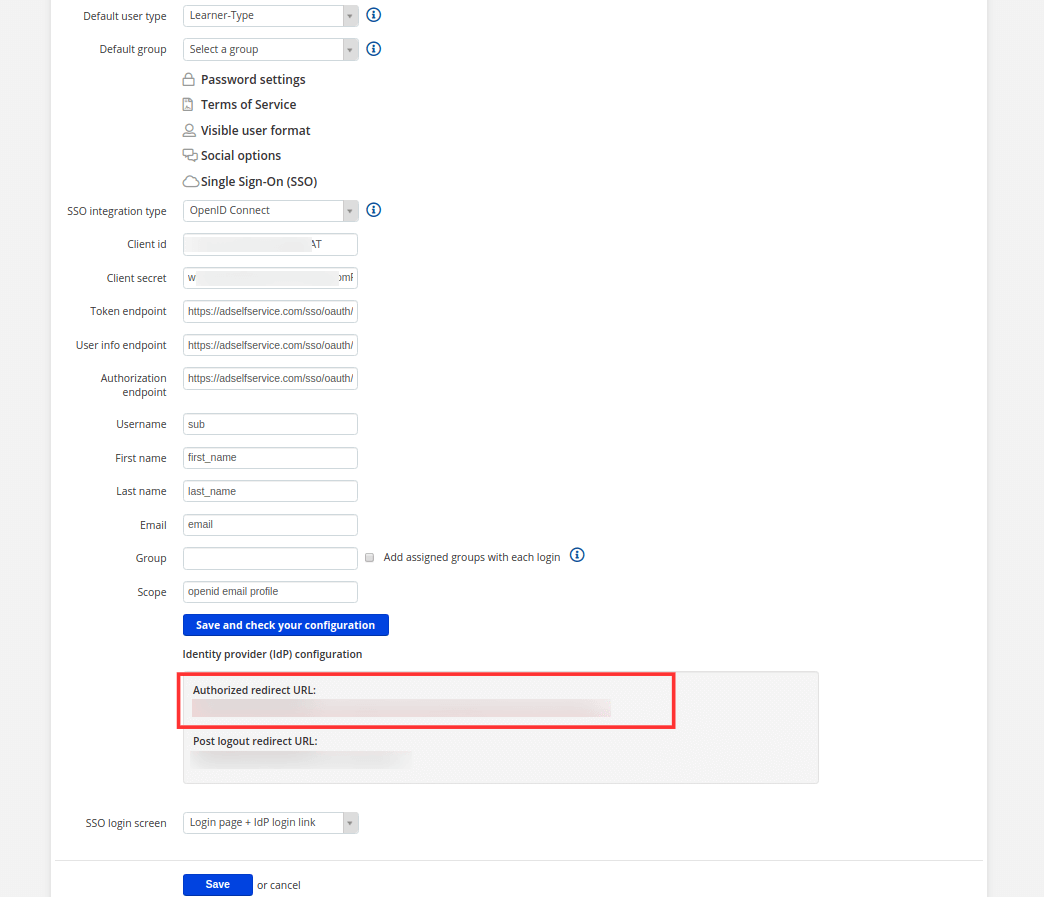
- Now, you need to copy the Authorized redirect URL from TalentLMS to configure ADSelfService Plus.
ADSelfService Plus (identity provider) configuration steps
Switch back to ADSelfService Plus' TalentLMS configuration page.
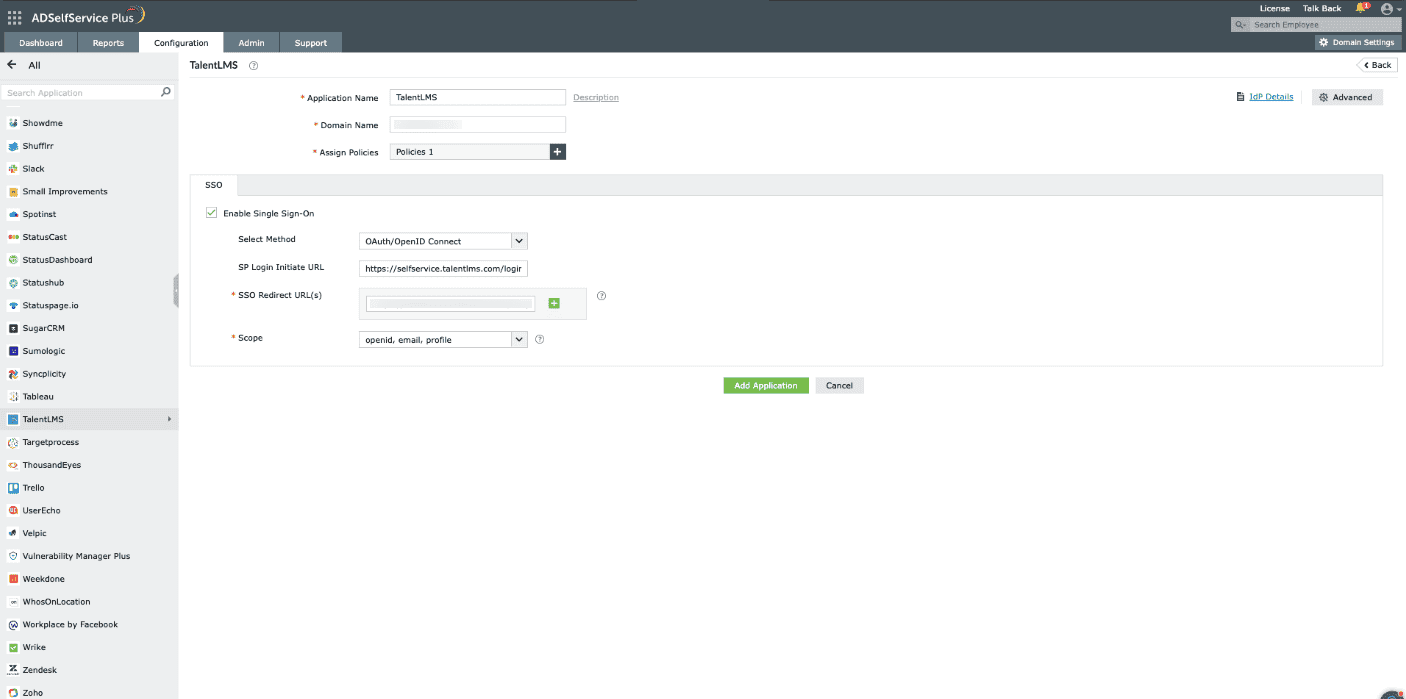
Enter the Application Name and Description as per your preference.
Enter the Domain Name of your TalentLMS account. For example, if your TalentLMS username is johnwatts@thinktodaytech.com, then thinktodaytech.com is your domain name.
- In the Assign Policies field, select the policies for which SSO need to be enabled.
Note: ADSelfService Plus allows you to create OU and group-based policies for your AD domains. To create a policy, go to Configuration > Self-Service > Policy Configuration > Add New Policy.
- Under the SSO tab, select Enable Single Sign-On.
- Choose OAuth/OpenID Connect from the Select Method drop-down.
- Enter the TalentLMS portal's login URL in the SP Login Initiate URL field.
Note: TalentLMS requires sign-in to begin from their login page, known as SP-initiated login. Users are first directed to the TalentLMS login page, specified in the SP Login Initiate URL field, after which TalentLMS (the SP) redirects them to ADSelfService Plus (the IdP) for authentication.
- Enter the Redirect URL copied in Step 7 of configuring TalentLMS in the SSO Redirect URL field.
- Using the Scopes drop-down, select openid, which is the scope required for OIDC authentication. You can also specify scopes such as profile or email to include extra user information in the authorization request.
Note: Scopes specify the level of access the access token has. They are typically included in the authorization request. Specify the scopes for which you wish to allow access to your authorization token, using the drop-down.
- Click Add Application to save the configuration.
The Well-known Configuration URL in the IdP details pop-up contains all the endpoint values, supported scopes, response modes, client authentication modes, and client details. This is enabled only after you finish configuring the application for SSO in ADSelfService Plus. You can provide this to your service provider if required.
 ADManager Plus
 ADAudit Plus
 Exchange Reporter Plus
 M365 Manager Plus