Conditional Access
What is conditional access?
Conditional access is the process of protecting access to IT resources based on predefined conditions. By creating access policies based on users’ device types, time of access, IP addresses, or geolocation, you can strictly control access to your network and data. Conditional access provides added security and helps prevent attackers from gaining access to IT resources.Click to learn about the benefits of conditional access.
ADSelfService Plus helps you implement conditional access to ensure only authorized users have access to workstations, applications, and various features that are available in ADSelfService Plus, including access to other endpoints and linked applications.
Understanding how conditional access works in ADSelfService Plus
To understand how conditional access works in ADSelfService Plus, you need to understand the basics first. Conditional Access relies on certain conditions and criteria, which are used to create a conditional access rule. This rule determines which self-service policy will be applied to a user, which in turn determines the multi-factor authentication methods, enterprise applications, and self-service features that are enabled for that user.
Conditions
Conditions are user-related factors, such as device type, IP address, or geolocation. Under this section, you can both define your conditions and then select them to define your criteria as needed. You can define and select your conditions based on the following factors:
- IP address: If configured, Conditional Access will evaluate the incoming connection based on the IP address of the device initiating the connection. You can choose the kind of IP addresses you are configuring the condition for: static IPs, proxy server IPs, or VPN IPs. You can also define whether the IP addresses you specify are Trusted or Untrusted IPs.
- Device: You can configure this condition to evaluate the incoming connection based on the type of device it is originating from: specific computer objects, and/or the platform (Windows, macOS, Linux, mobile web app, or native mobile app) they run on.
- Business hours: You can define business and non-business hours, and choose to evaluate the incoming connection based on whether it occurs during business (or non-business) hours.
- Geolocation: Configure this condition to evaluate incoming connections based on the country of origin.
Note: Geolocation-based condition relies on IP address of the user to determine the location. Hence, only access from public IP addresses will be evaluated. Users with private IP addresses will fail this condition.
Criteria
Once you have defined and enabled the conditions based on your requirement, you can combine the enabled conditions using AND, OR, and NOT operators to formulate a criteria, which will determine how the different conditions are evaluated to determine the access request's result.
For example, assume your users are located all over the world except in some countries. You need to ensure that they access resources only during business hours and from trusted IP addresses alone. In such a case, you need to enable:
- IP address condition (with the trusted IPs).
- Business hours condition (with allowed time).
- Geolocation condition (with the countries where you don’t have users).
Then, you can use a logical function like the one below to formulate your criteria
Criteria: 1 AND 2 AND (NOT 3)
CA rule
By associating the criteria with one or more self-service policies, you create a CA rule. A self-service policy allows you to enable the product’s features and configure how it should work for different sets of users based on their OU and group membership.
If you create multiple CA rules, you can choose to prioritize them. So, if a user falls under multiple CA rules, the rule with the highest priority will take effect, and subsequently, the self-service policies associated with that rule will be applied to the user. If a user does not fall under any CA rule, then the self-service policies will be applied based on the priority set to the policies in the Policy Configuration page.
Configuring Conditional Access
Rule configuration
- Login in to ADSelfService Plus as an admin.
- Navigate to Configuration > Self-Service > Conditional Access > Rule configuration.
- Click Configure New Conditional Access (CA) Rule.
- Enter a CA Rule Name and Description.
- Select the Conditions based on your requirements:IP Address, Device Type, Business Hours, and Geolocation.
Note: These conditions are the basis for making a Conditional Access decision. this section, you can define the conditions you need, enable them, and use them in a criteria.
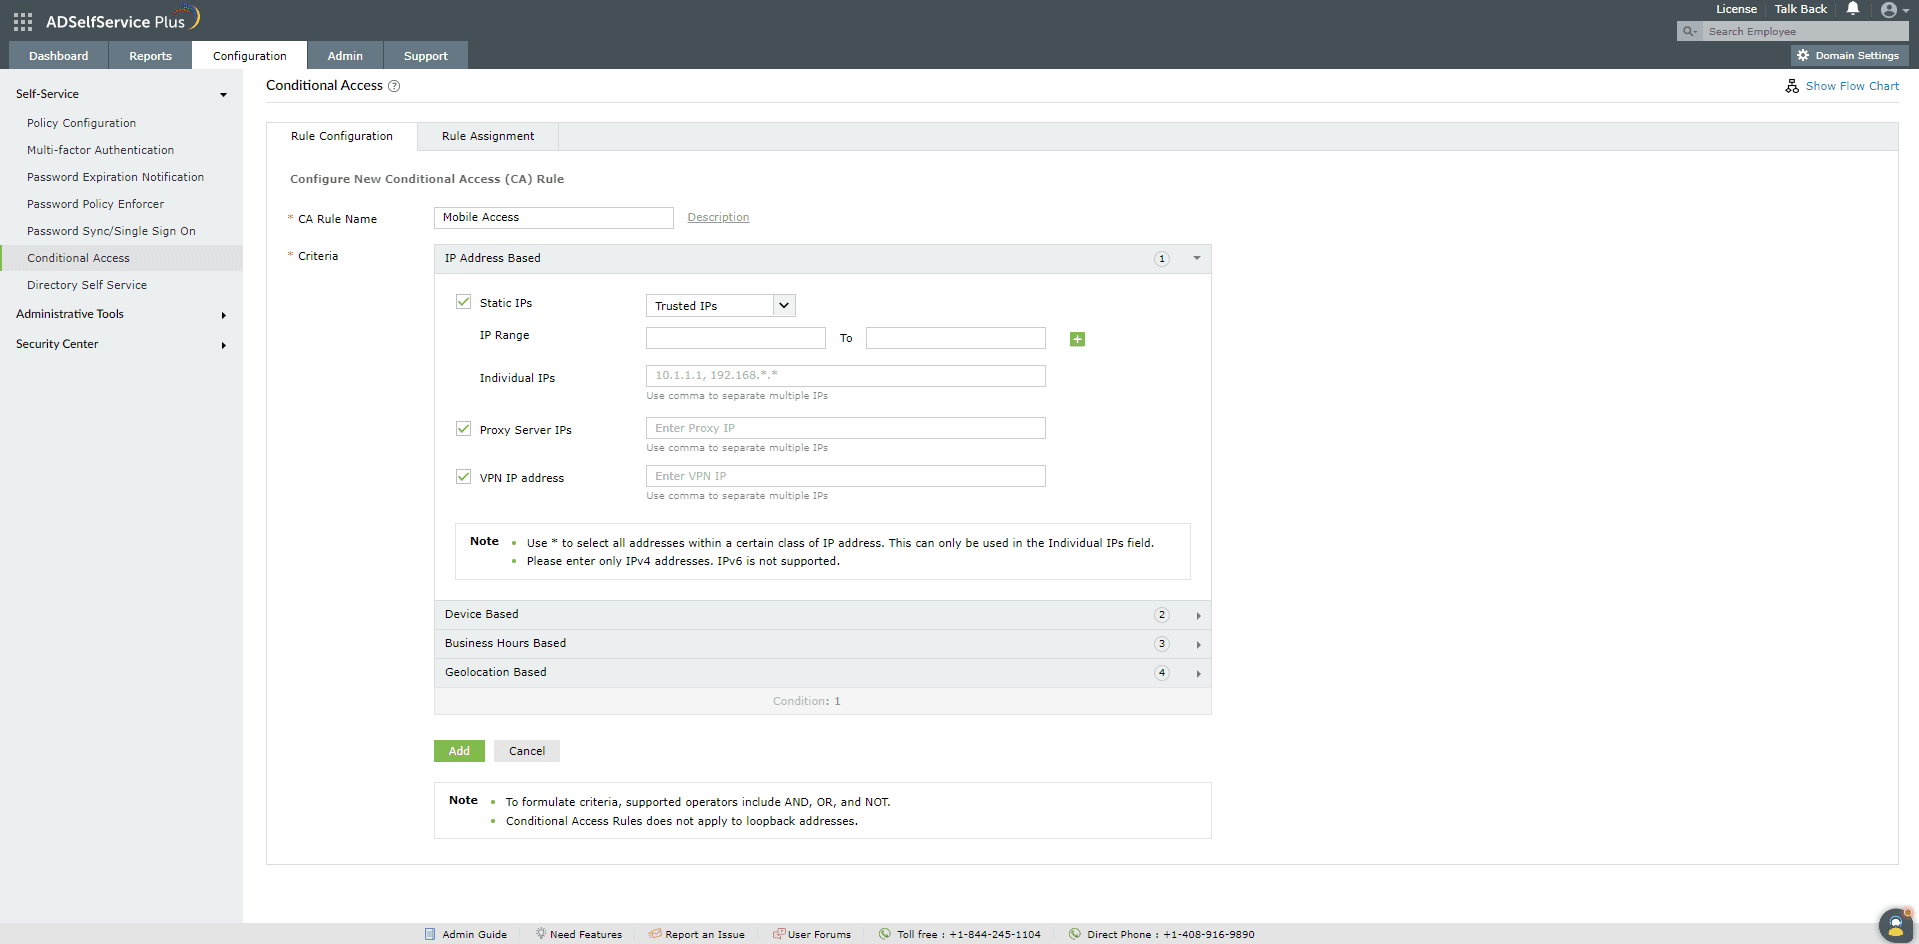
- IP address based
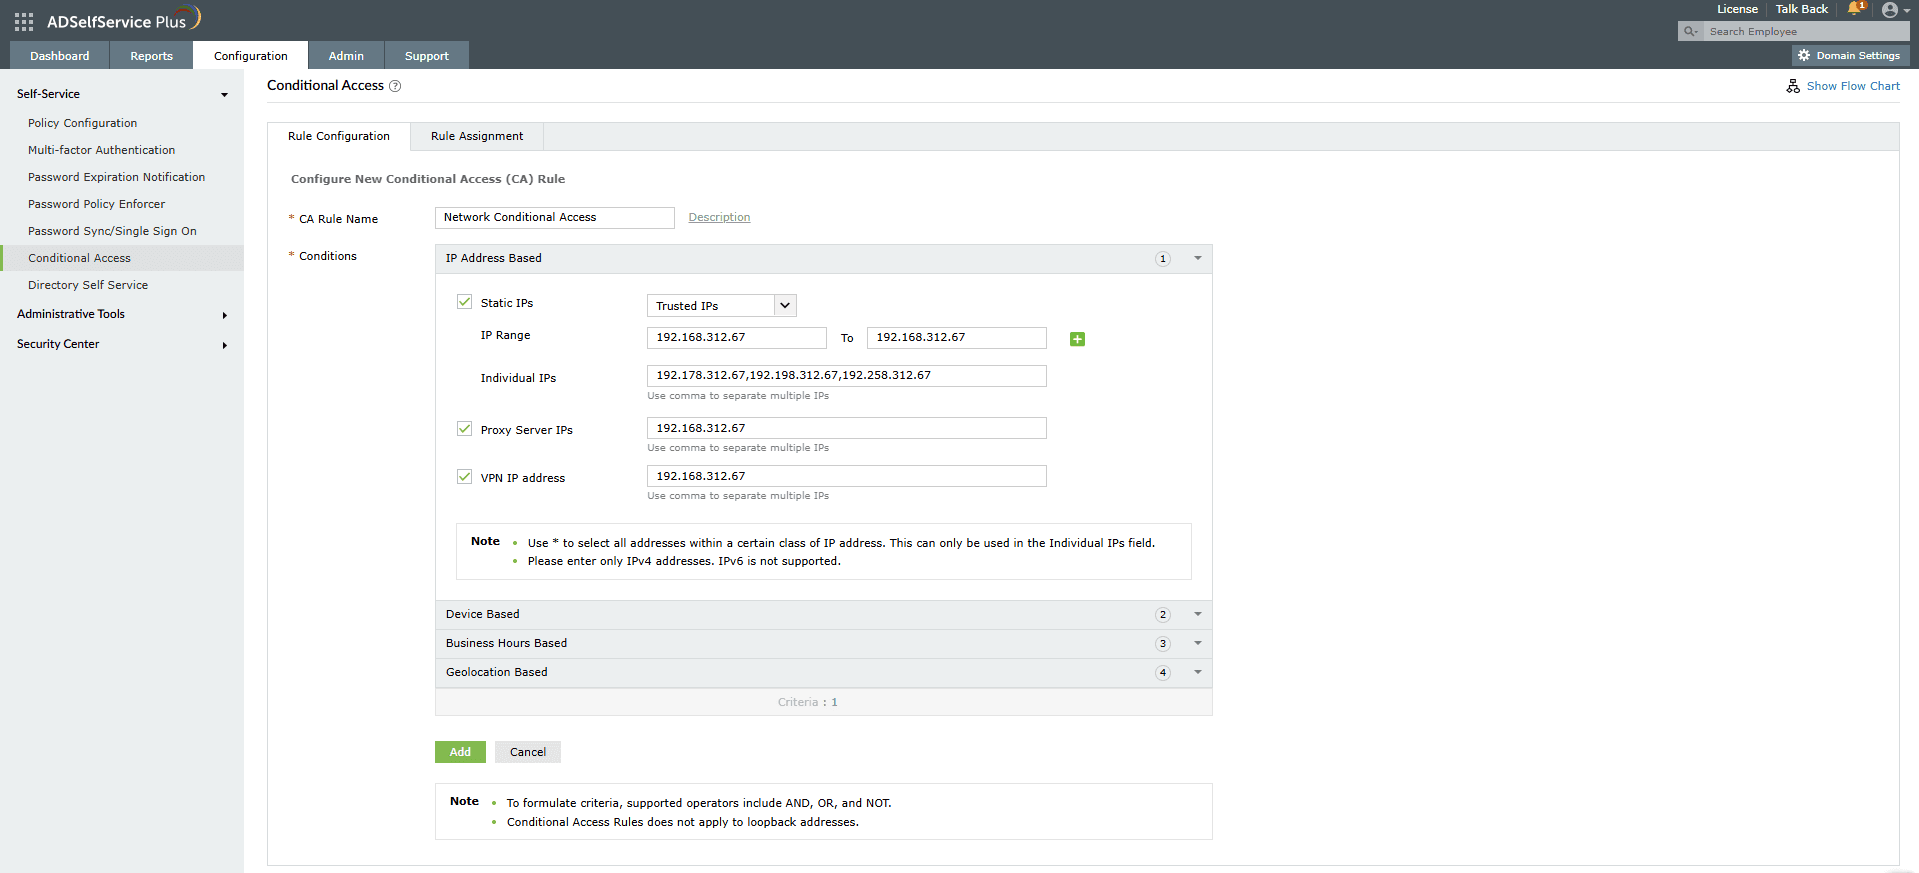
- To include this condition in your criteria, select the types of IP addresses to be evaluated by checking the respective boxes:
- For users who connect to your network directly through their client computers, you can enable Static IP.
- If your users connect through a proxy server, you can enable Proxy Server IP.
- If your users connect through a VPN server, you can enable VPN IP. To ensure that Ip-based conditional access works for the VPN MFA feature, refer to this section to make the required changes at the NPS extension.
Note: If you have enabled all three types of IPs, the priority will be decided based on this rule: * (Static IP AND Proxy IP) OR VPN IP
- Select whether the IPs you've entered are Trusted or Untrusted.
- For static IPs, enter the range of IP addresses in the IP Range fields. Use the + icon to add more IP ranges. You can also enter individual IPs and use * as the wildcard character for selecting an entire class of IP addresses.
- Device based
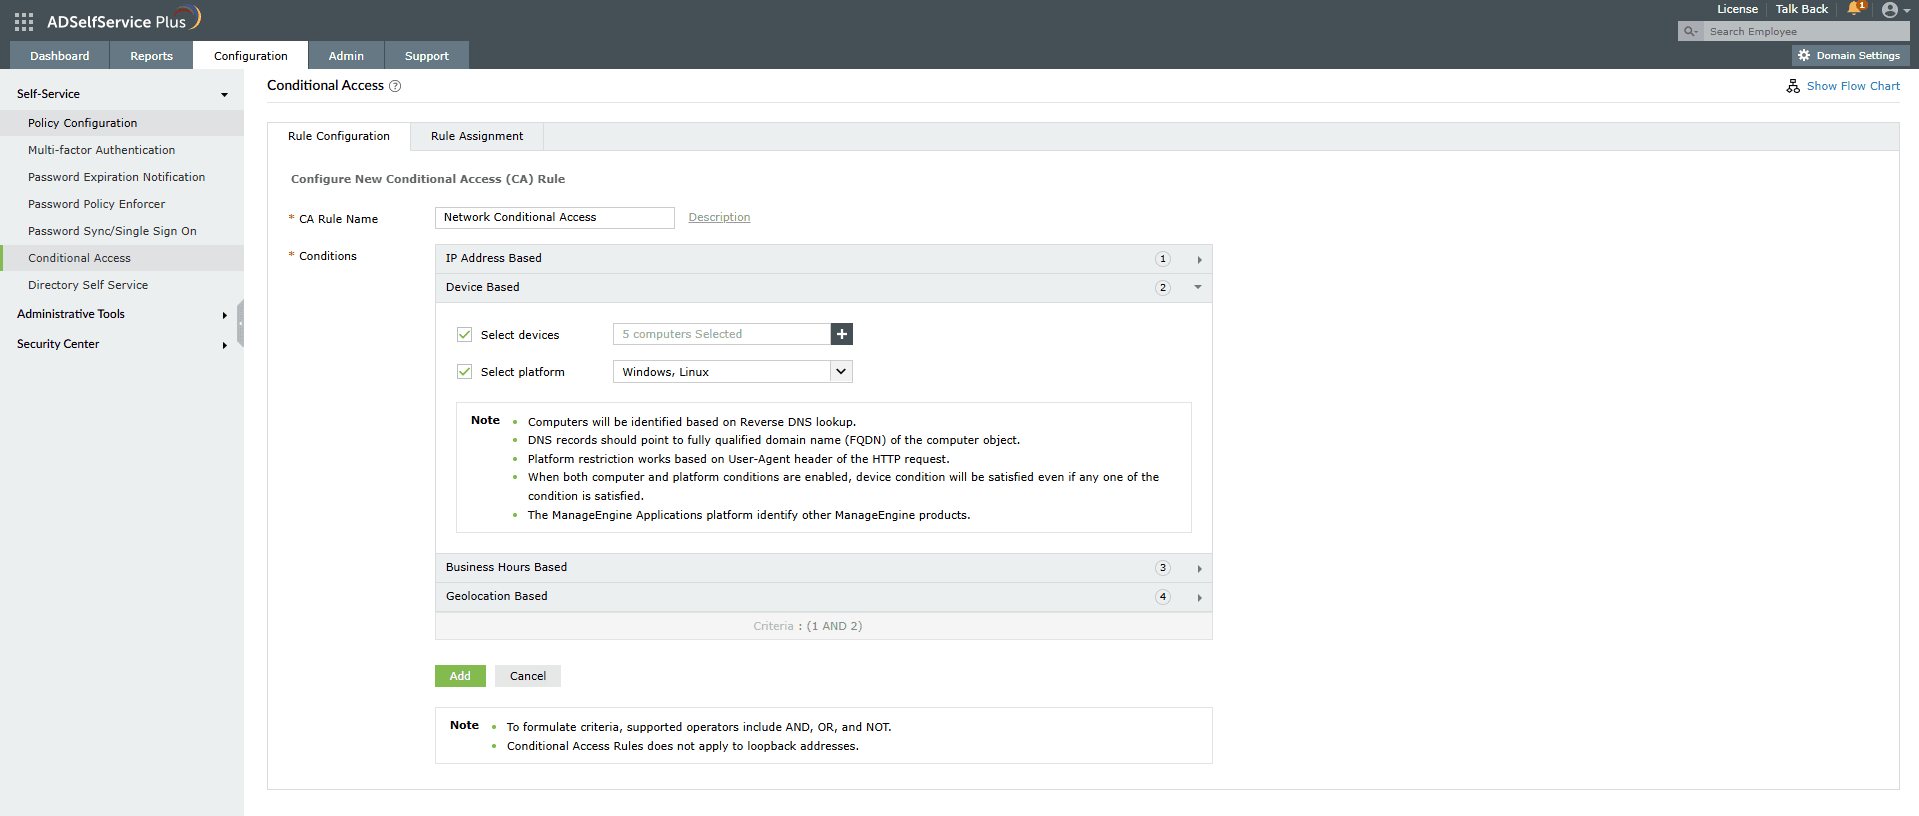
- Include this condition in your criteria by selecting the Computers checkbox and then click on the + icon.
- In the Selected Computer dialog box that opens, select the domain and then the computer objects. Click Save.
- Select the Platforms checkbox and then use the drop-down to select the platform(s). You can choose from Windows, macOS, Linux, the ADSelfService Plus mobile web app, the ADSelfService Plus native mobile app, and ManageEngine applications.
- Business hours based
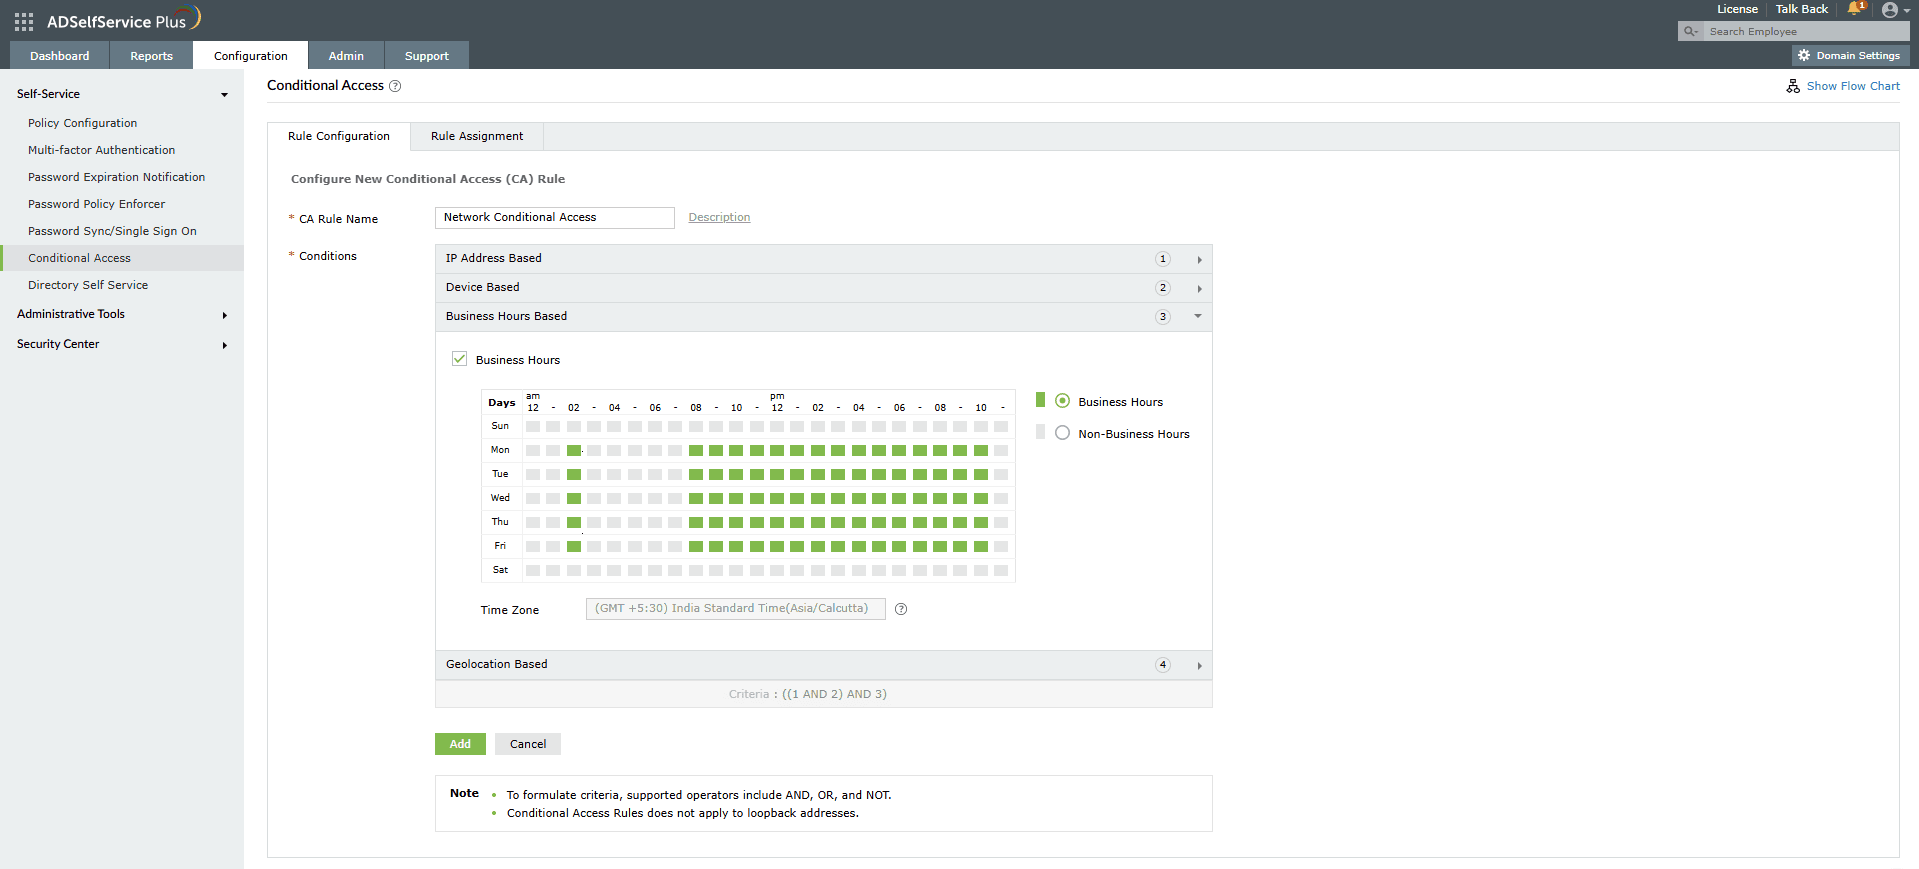
- Select the Business Hours checkbox to configure your criteria with this condition.
- Select whether you want to configure business hours or non-business hours by clicking on the corresponding radio button.
- From the Day and Time range provided, configure your business or non-business hours.
Note: The time will be applied based on the time zone you have selected in the Admin > Personalize > Time Zone setting.
- Geolocation based
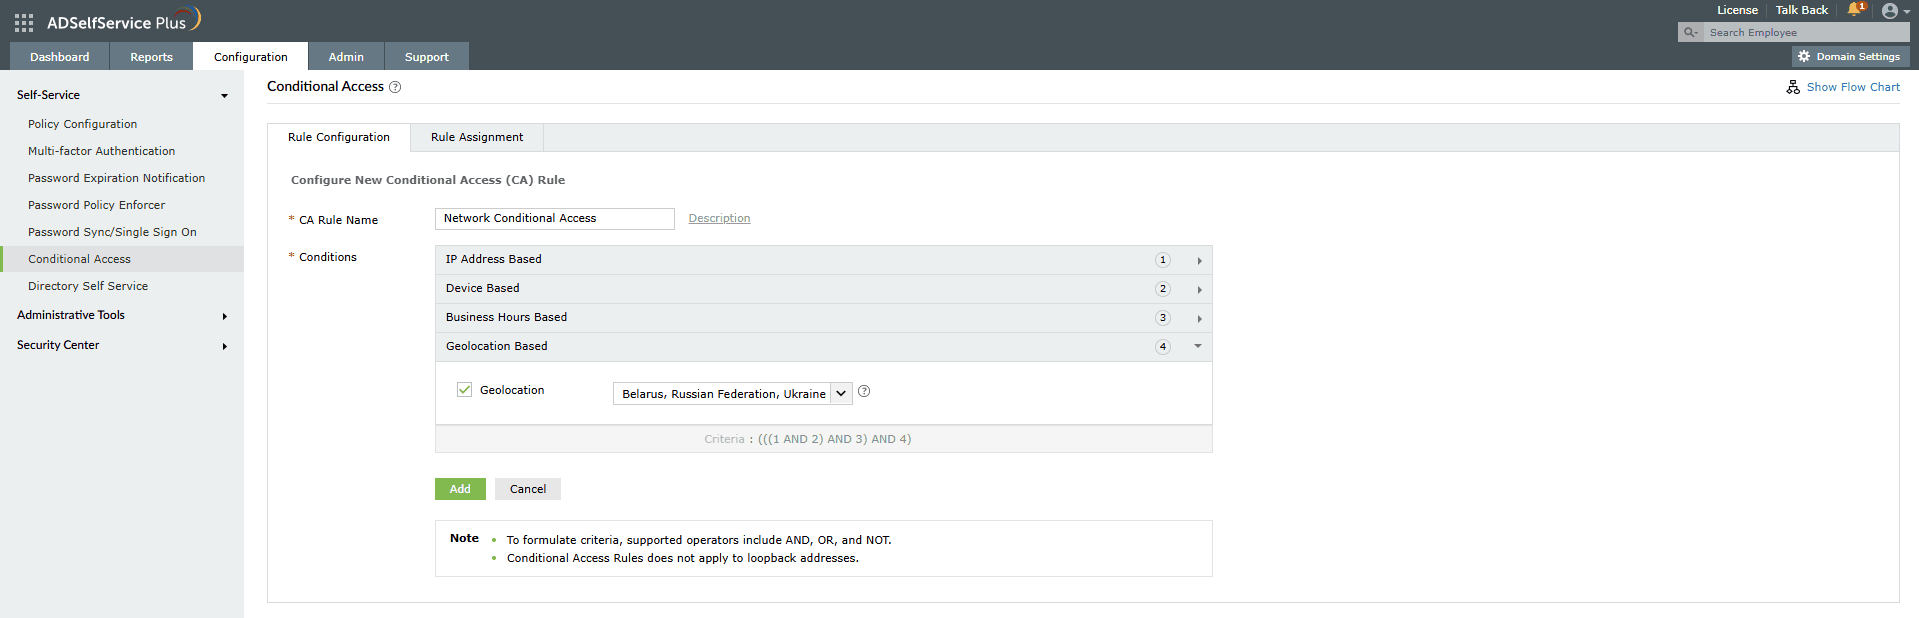
- Select the Geolocation checkbox to enable this condition.
- Select the Countries from the drop-down.
- How geolocation-based CA works in ADSelfService Plus
- ADSelfService Plus connects to the geolocation server using Zoho Creator. Please ensure that https://creator.zoho.com is excluded from your firewall settings for geolocation-based conditional access to work.
- Geolocation-based conditional access relies on the user's IP address to determine the location. Hence, only access from public IP addresses will be evaluated. This condition will not include users with private IP addresses.
- A Criteria is automatically created with the conditions you have enabled. If the created criteria matches your requirements, you do not have to make any changes to it. Modify them only if you are sure that they still do not satisfy your requirements. You can use AND, OR, and NOT operators to formulate the logic.
- Click Configure to create the new CA Rule.
Rule assignment
Once the CA Rule has been set up, it must be assigned to the users who will be assessed for CA. To do so:
- Login to ADSelfService Plus as an admin.
- Go to Configuration > Self-Service > Conditional Access > Rule assignment.

- Select the rule that you want to assign from the drop-down.
- Select the policy that applies to the users you want to be evaluated.
Note: This refers to the self-service policy that you can configure by going to
Configuration > Self-Service > Policy Configuration. To learn more, refer to
this page.
Please note that if a user belongs to multiple policies, at least one of which has been configured for CA, they will be able to perform only the actions permitted to them under the policy for which the CA rule has been satisfied by the user.
Example: Consider three self-service policies, A, B, and C, and two conditional access rules, 1 and 2. Assume a user belongs to policies A and B. Let's say both policies A and C are assigned to rule 1. If a user satisfies rule 1, then only policy A will be assigned to the user as he belongs only to policy A.
- Also, allow or block NTLM single sign-on and ADSelfService Plus portal access. These settings will be applicable wherever the selected rule is satisfied.
Note: The option to allow or block NTLM single sign-on will be enabled only if
NTLM authentication is configured in logon settings.
Prioritizing the conditional access rules
If you have created multiple conditional access rules, you can set priority for each rule so that the rule with the highest priority is applied to users who fall under multiple rules.
To prioritize the conditional access rules:
- In the Conditional Access configuration page, click on the change priority icon at the top right corner (next to the Configure New Conditional Access (CA) Rule button).
- Drag the rules and order them based on your requirements. The rule at the top will have the highest priority.
Modifying, copying, disabling, and deleting conditional access rules
A rule can be modified to change the conditions or condition logic, copied to create a new rule, disabled, or deleted.
- Go to the Conditional Access configuration page (Configuration > Self-Service > Conditional Access).
- You will see a table containing all the conditional access rules that have been created.
- Under the Actions column, click on an icon based on the action you want to perform.
- Toggle the
 and
and  icons to enable or disable a rule. If there is a ☑ icon, it means the rule is enabled, and if there is a ☒ icon, it means the rule is disabled.
- Click on the
 icon to modify the rule.
- Click on the
 icon to copy the rule and create a new rule from it.
- Click on the
 icon to delete a rule.


 ADManager Plus
 ADAudit Plus
 Exchange Reporter Plus
 M365 Manager Plus