Configuring Smart Card Authentication via ADSelfService Plus
Using the smart card authenticator, you can protect enterprise apps, Windows machines, self-service
actions like password resets and account unlocks, Outlook on the web logins, VPN logins via secure
verification links, and logins to ADSelfService Plus.
Configuring smart cards for MFA
Follow the steps below to learn how to configure smart cards for MFA.
Prerequisites
Important: Windows provides smart-card-based logins by default, which you will need to disable to
use ADSelfService Plus' Smart Card Authenticator, other MFA methods, and AD password verification to
secure machine logins. To learn about what smart cards are, how the authentication process works, and
other ways to leverage smart card authentication using ADSelfService Plus, click
here.
Preparing your smart card authentication environment
Enrolling for smart card authentication can be done by users as well as the admin. You will need to refer
to the documentation provided by your smart card vendor to achieve this. The general steps to be
followed are given below.
- Users need to be issued a digital certificate and a private key from your organization's CA. If you
are using AD CS, you can refer to the Microsoft
guide, which explains how admins as well as users can request and be granted certificates.
- The certificates thus issued need to be added into the userCertificate attribute in AD for
the respective users.
Note: Step two can be ignored when AD CS is the CA, as users' digital
certificates are automatically linked to their
userCertificate attribute in AD. If an
external CA is used for smart card enrollment, the certificates must be imported into AD and linked
to the
userCertificate attribute.
Learn
more.
- Now, the certificate and the private key (usually issued together as a PFX file) for the users from
the CA should be enrolled into the smart cards to complete the preparation steps.
For smart cards on machines:
- Windows: Import the PFX file directly into the user's personal store via the Certificate
Manager tool (certmgr.exe).
- macOS: Not applicable (only physical smart cards are compatible with macOS).
- Linux: Using your browser settings, import the PFX file via the Certificate
Manager tab, and the CA root certificate via the Authorities tab.
For physical smart cards, please refer to the documentation provided by your smart card vendor on how
to enroll the certificates with the hardware.
Configuration steps
- Log in to the ADSelfService Plus web portal with administrator credentials.
- Navigate to Configuration > Multi-factor Authentication > Smart Card Authentication.

- In the Import CA Root Certificate field, click Browse to import the required root
certification file (X.509 certificate) obtained in step two of the
prerequisites section above.
- Click Save.
Note:
- It is recommended to restart ADSelfService Plus following smart card configuration to ensure
proper functioning of the authenticator.
- At present, smart card authentication can be used to protect enterprise apps, Windows machines,
self-service actions like password resets and account unlocks, Outlook on the web logins, VPN
logins via secure verification links, and logins to ADSelfService Plus.
- Passwordless logins can be configured for the ADSelfService Plus portal using smart cards. Learn more.
- Smart card authentication is not supported for logins to macOS or Linux machines, the
ADSelfService Plus mobile site, or the mobile app.
- Smart card authentication requires the login agent to be version 8.6 or above for Windows login
MFA. If the login agent is of an older version and smart card authentication is a mandatory
authenticator or the only MFA method set up for machine logins, access will be denied.
- Smart card authentication is not supported when Load Balancer or Reverse Proxy
is enabled for ADSelfService Plus.
- The Trust this browser
setting
is not supported for logins to enterprise apps or the ADSelfService Plus portal when smart card
authentication is the only authenticator configured.
Disabling the Windows smart card credential provider
When machine logins are secured using ADSelfService Plus' smart card authenticator, a password is
initially required, followed by smart card authentication (MFA). However, Windows offers native smart
card authentication as well, which lets users log in to machines as soon as they insert a smart card,
bypassing the need to enter a password. To ensure that machines are secured using both a password and
ADSelfService Plus' MFA, you will need to disable native smart card logins on machines with a GPO using
the steps below.
- To disable the smart card credential provider, a Windows Group Policy setting must be configured
using either the local Group Policy Editor (gpedit.msc) or the Group Policy Management Editor
(gpmc.msc):
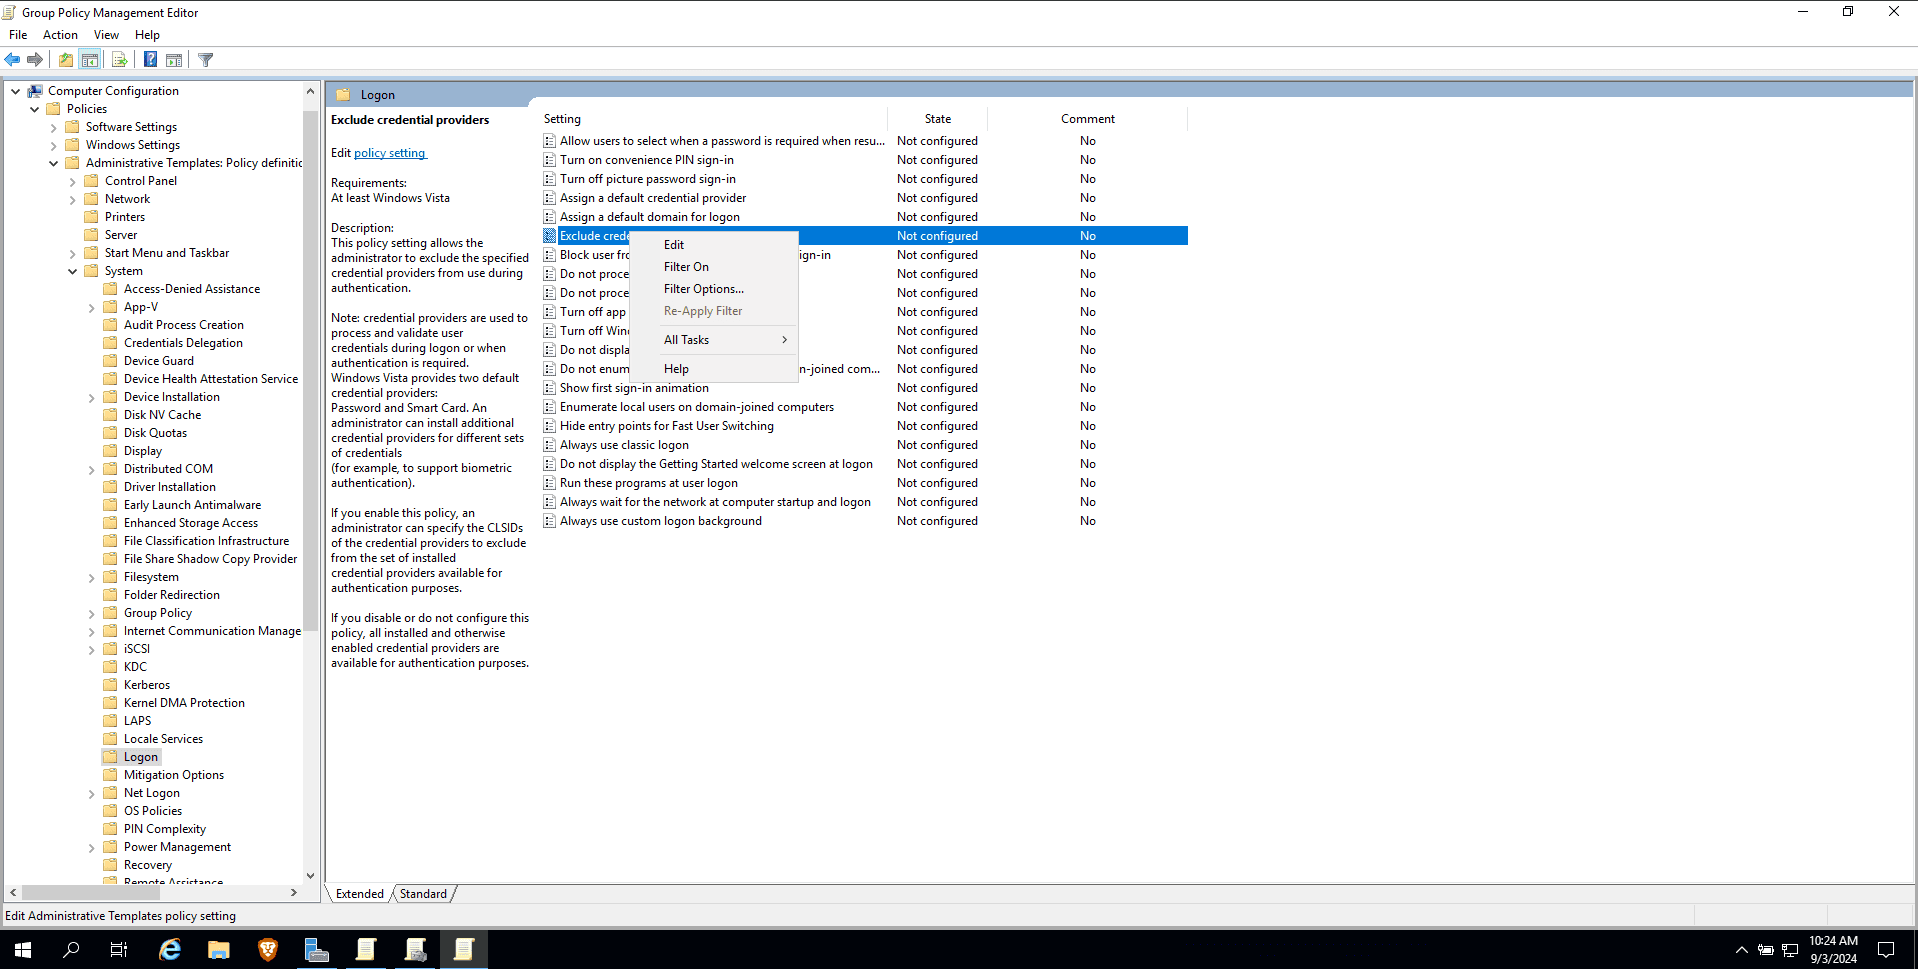
- Modify an existing Group Policy or create a new Group Policy and navigate to Computer
Configuration > Policies > Administrative Templates > System > Logon > Exclude credential
providers.
- Right-click Exclude credential providers and click Edit.
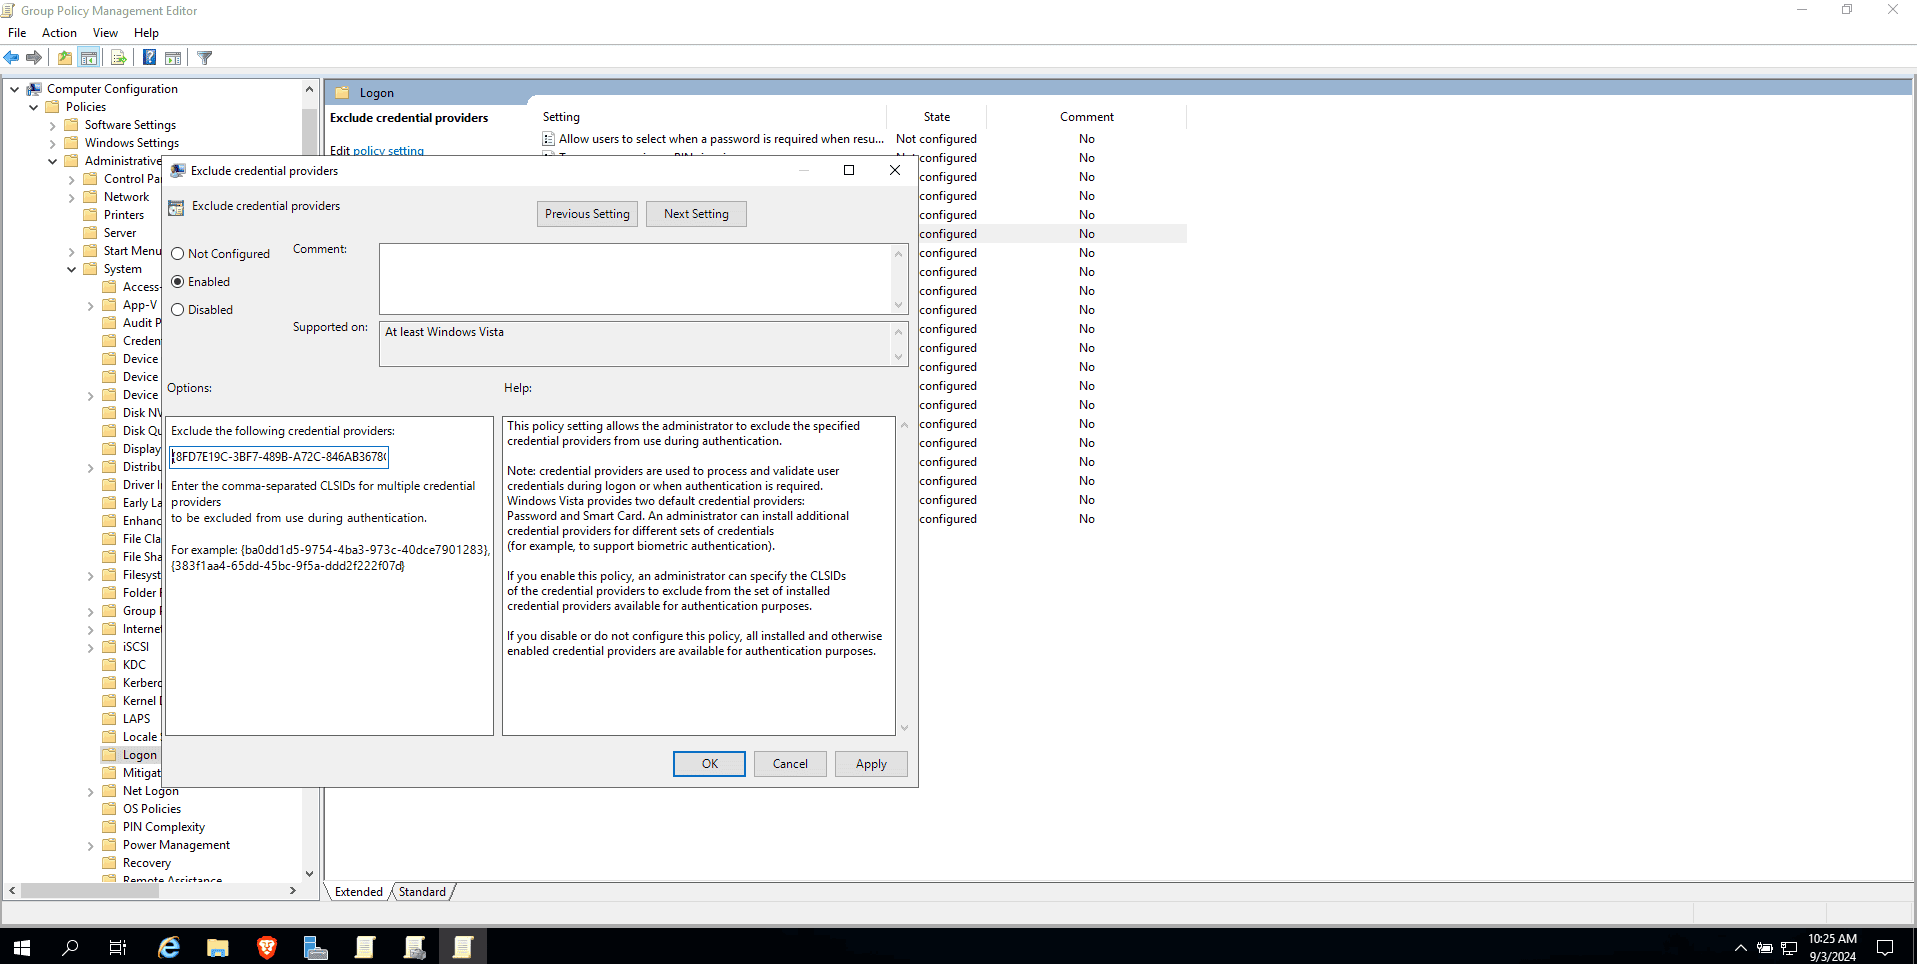
- Select Enabled.
- In the Exclude the following credential providers field, enter
{8FD7E19C-3BF7-489B-A72C-846AB3678C96} to disable the default Windows smart card
authentication for machine logins.
Note: It is recommended to disable all Windows credential providers except
the password credential provider while securing Windows machine logins using ADSelfService Plus.
- Click Apply and then OK.
Managing smart card authentication configurations
After you have added a smart card for authentication, you can perform any of the following functions:
Adding a new smart card
- Navigate to Configuration > Multi-factor Authentication > Smart Card Authentication.
- Click the Add Certificate Authority button in the top-right corner.
- Enter all the required details and click Save.
Enabling or disabling a configured smart card
- Navigate to Configuration > Multi-factor Authentication > Smart Card Authentication.
- To enable or disable a configured smart card, click the red icon (
 ) or the green check icon (
 ) located in the action
column of a particular smart card.
) located in the action
column of a particular smart card.
Deleting a configured smart card
- Navigate to Configuration > Multi-factor Authentication > Smart Card Authentication.
- Click the delete icon (
 )
on the smart card which you wish to delete.
)
on the smart card which you wish to delete.
- Click Yes to confirm the deletion.


 ADManager Plus
 ADAudit Plus
 Exchange Reporter Plus
 M365 Manager Plus