SMS Verification
Once SMS verification is enabled, users can enter the verification code sent to their mobile number to prove their identity.
Prerequisites
- The SMS server must be configured. To do so, log in to the ADSelfService Plus admin portal and configure your email server under Admin > Product Settings > Mail / SMS Settings.
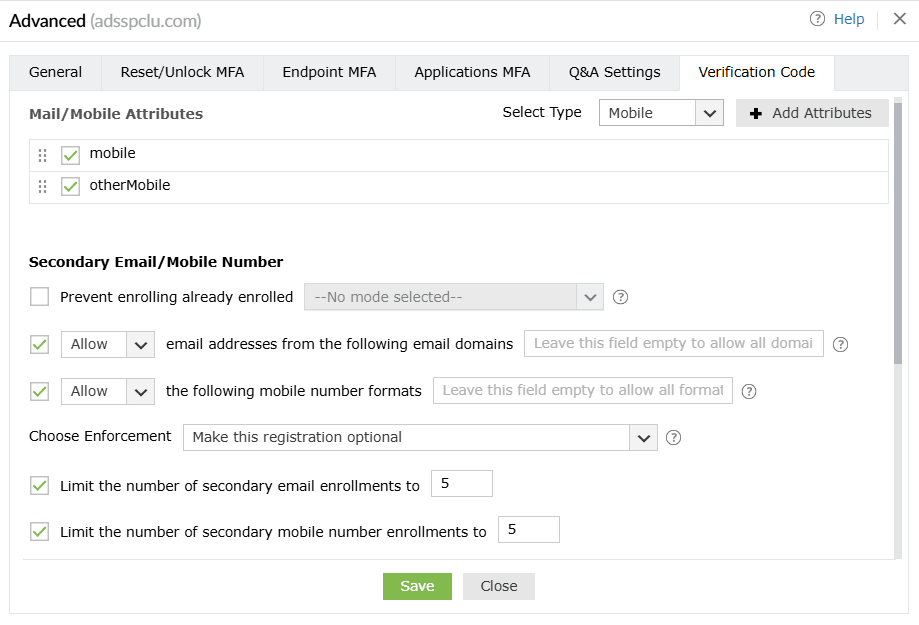
- The mobile attributes must be configured under Configuration > Self-Service > Multi-factor Authentication > Advanced > Verification Code.
Steps to configure SMS verification
- Navigate to Configuration > Self-Service > Multi-factor Authentication > Authenticators Setup.
- From the Choose the Policy drop-down, select a policy.
Note: ADSelfService Plus allows you to create OU- and group-based policies. To create a policy, navigate to Configuration > Self-Service > Policy Configuration > Add New Policy. Click Select OUs/Groups and make selections based on your requirements. You need to select at least one self-service feature. Finally, click OK > Save Policy.
- Click SMS Verification.
- Choose from the options in the Select Type drop-down:
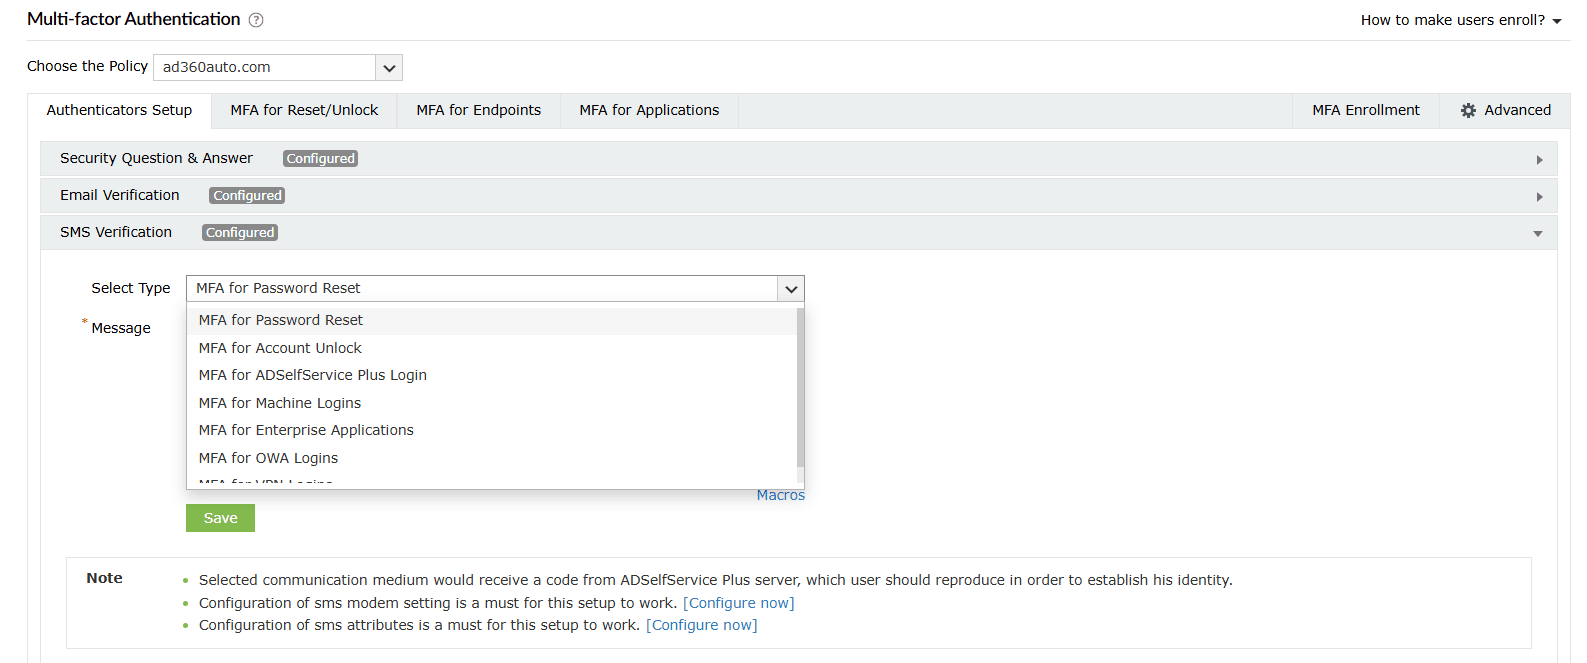
- MFA for Password Resets: For when the user performs self-service password resets
- MFA for Account Unlocks: For when the user performs self-service account unlocks
- MFA for ADSelfService Plus Login: For when the user logs in to the ADSelfService portal
- MFA for Machine Login: For when the user logs in to a Windows, macOS, or Linux machine physically or remotely
- MFA for Cloud Applications: For verification when the user accesses their enterprise applications
- MFA for OWA Login: For when the user attempts to access the Outlook on the web portal
- MFA for VPN Login: For when the user attempts to access the corporate network through a VPN
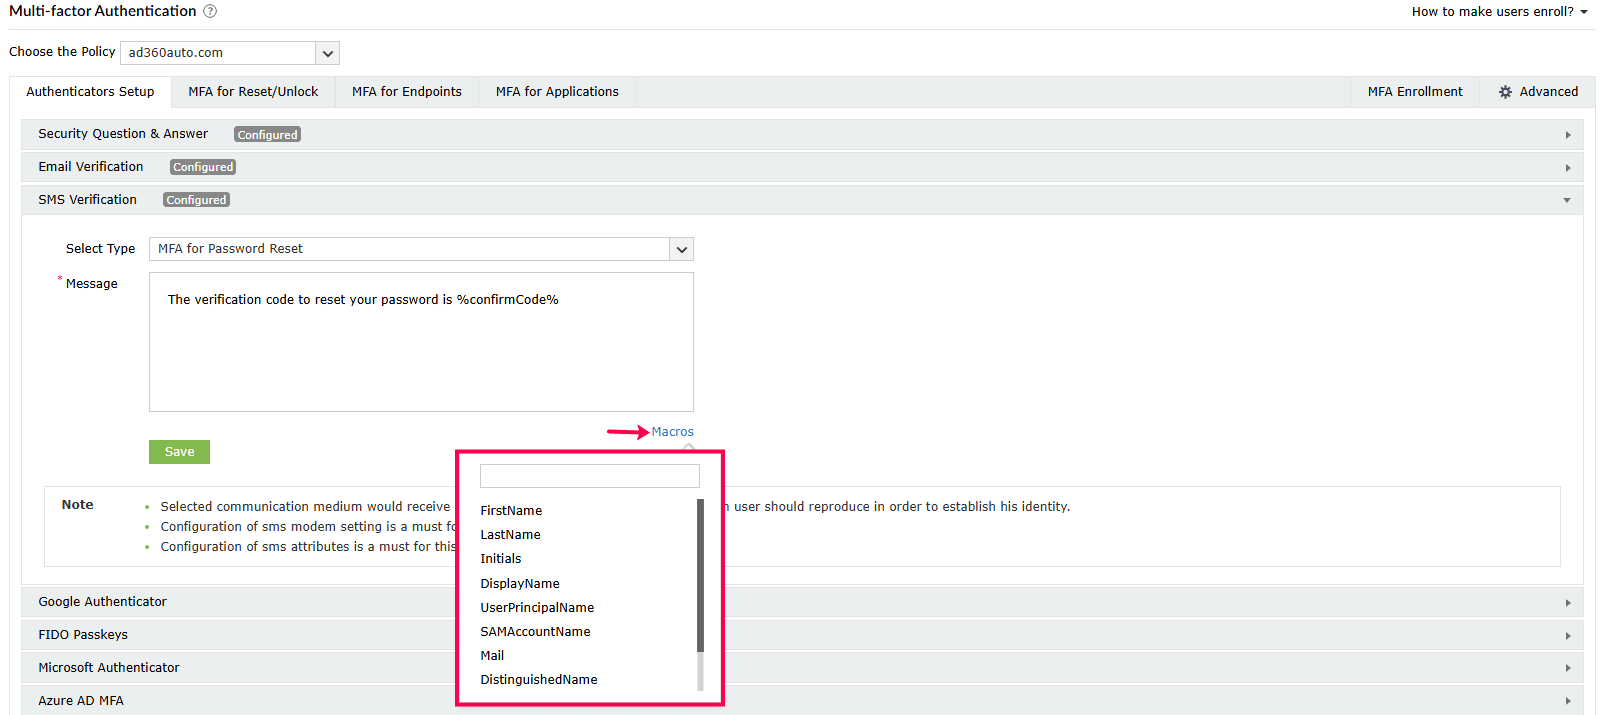
- Customize the Message to be used for SMS verification according to your organization's requirements.
- Click Save.
Tip: Click the Macros button to use the listed macros in the Message.


 ADManager Plus
 ADAudit Plus
 Exchange Reporter Plus
 M365 Manager Plus